Last weekend we celebrated an early Easter with my husbands family and while we were at it, we threw in three birthdays for good measure. Here are the cards I made:
This card went to my father-in-law, and was done with a bokeh technique I learned about here. The background came together pretty quickly and I was happy with the results. I stamped on a Papertrey Ink sentiment (from the Graceful Greetings set) and glued on some faceted gem-like things I picked up at a stamp convention a few years ago. Overall, a very pretty card!
This card was for my nephew, who is turning 12 next month. It's a pretty simple card- just a navy base with the negative bits from the Papertrey Quatrefoil Coverplate die cut from patterned paper glued in place (I used the rest of the die cut as a template to place the pieces). Then I used versamark and white embossing powder to add the greeting (from Papertrey, stamped multiple times).
The last card was for my niece, who turned 10 earlier this month. The popsicle stamps and greeting are from the Summer Sweetness set from Papertrey. After stamping the popsicle and drips in orange dye ink, I stamped over them with versamark and heat embossed with clear powder to give it that shiny popsicle look. The patterned paper was from a 6x6 paper stack my husband gave me for Christmas. It was a perfect pair for this stamp set!
Thanks for checking out my cards!
Sunday, March 27, 2016
Saturday, January 16, 2016
Winter Wonderland
The Challenge this week from Art Impressions is "Winter Wonderland". I don't have very much in the way of winter stamps, especially ones that are not Christmas themed. So I decided to transform a non-winter stamp into something more appropriate!
I started with the "Eat Itself Set" from AI. The woman in the image is wearing a birthday hat and holding a cake behind her back. I selectively inked to remove the cake from my stamped image and sketched in a few snowballs! I also trimmed off the hat when I cut her out.
I wanted an inside greeting that went with her hidden stash of snowballs, and I think this hits it nicely.
I used a stitched square frame die from My Favorite Things for the window frame. I also used a couple of MFT stitched rectangle dies to cut the patterned paper. They are from several of their Blueprint die sets. The front sentiment is from Lawn Fawn. I created the inside sentiment with an old alphabet set from Impression Obsession that must be retired (called Scribble) and the Headline Alphabet dies from Papertrey Ink.
I've been meaning to get my Spectrum Noir markers all sorted out into storage trays and play with them more, so this card was the perfect reason. I don't have very much experience with alcohol markers, but I do love to color. I was pretty pleased with how well she turned out. Especially her hair, since hair can be hard to color well.
Thanks for checking out my card!
I started with the "Eat Itself Set" from AI. The woman in the image is wearing a birthday hat and holding a cake behind her back. I selectively inked to remove the cake from my stamped image and sketched in a few snowballs! I also trimmed off the hat when I cut her out.
I wanted an inside greeting that went with her hidden stash of snowballs, and I think this hits it nicely.
I used a stitched square frame die from My Favorite Things for the window frame. I also used a couple of MFT stitched rectangle dies to cut the patterned paper. They are from several of their Blueprint die sets. The front sentiment is from Lawn Fawn. I created the inside sentiment with an old alphabet set from Impression Obsession that must be retired (called Scribble) and the Headline Alphabet dies from Papertrey Ink.
I've been meaning to get my Spectrum Noir markers all sorted out into storage trays and play with them more, so this card was the perfect reason. I don't have very much experience with alcohol markers, but I do love to color. I was pretty pleased with how well she turned out. Especially her hair, since hair can be hard to color well.
Thanks for checking out my card!
Wednesday, November 18, 2015
A Floral Birthday
My mom and I got together to play in my craft room last night. It was the third Tuesday of the month, and for the last 14 years or so we have been getting together with a few other women to make cards on the third Tuesday. This month it was just the two of us. I had some new things to play with and my mom needed a birthday card to send to her mother. This was what I came up with:
The roses and leaves are from the Papertrey Ink set The Sweet Life. They are stamped in Stampin Up! inks. The pinks are all retired colors (Pretty in Pink, Rose Romance, and Pink Passion) but the greens are still current colors (Old Olive and Garden Green). The greeting is from another PTI set, Graceful Greetings, and stamped in Versa Fine Onyx Black ink.
It is a bit hard to see in the pictures, but after the front panel was stamped, cut out a square frame from it using the largest die in the Stitched Square Frames die set from My Favorite Things. I then cut four more frames from plain white card stock and layered them all together with the stamped frame on top. Everything was pieced back together on the 5"x5" card base. Finally, although it doesn't really show in the pictures, I carefully went over the lettering with a bit of clear Wink of Stella.
I feel like it still needs something, but I can't put my finger on what it is. I tried a few sequins, but I don't think that's it. Maybe some Wink of Stella on the flowers? I don't know. Oh, well! This one doesn't have an intended recipient right now anyway (my mom made her own version to mail to her mom).
Hope you liked the card and thanks for checking it out!
Wednesday, November 4, 2015
Water-based Inks- Part 2
The Current Challenge over at Art Impressions is to use water-based inks to make a card. This challenge celebrates the release of 3 new watercolor sets andI couldn't let a watercolor celebration pass without making a watercolor card. SO... I pulled out my newest watercolor set, Blooming Birdhouse, and made this cute little piece.
It just makes me happy to sit down with all of my watercolor stamps and a big bunch of markers to play. This card was made with all Marvy colors (I think!).
The watercolor paper and mat were both cut with circle dies and then layered on a pretty teal 4.25" square card. I happened to have a scrap of purple ribbon in the perfect shade, so that was tied around for a fun accent. I really love the way the colors pop on this one!
Thanks for checking out my card!
It just makes me happy to sit down with all of my watercolor stamps and a big bunch of markers to play. This card was made with all Marvy colors (I think!).
The watercolor paper and mat were both cut with circle dies and then layered on a pretty teal 4.25" square card. I happened to have a scrap of purple ribbon in the perfect shade, so that was tied around for a fun accent. I really love the way the colors pop on this one!
Thanks for checking out my card!
Water-based Inks
Even though the challenge is in celebration of the new watercolor sets, I decided to try something different and do some water coloring to fill in an image. I have watched Bonnie Krebs (Art Impressions owner and designer) watercolor one of the "girlfriends" images several times at stamp conventions and she makes it look so easy that I decided to try it myself.
I used stamps from the Shop Set, along with some distress inks (Stormy Sky and Victorian Velvet) and a few Spectrum Aqua markers (don't remember the color names- but they provided all of the brown tones in the card) smooshed or scribbled onto my palette. It was fun, but certainly not a quick as Bonnie can do it!
After it dried I die cut it with one of my new stitched rectangle dies from Gina Marie and layered it with some solid colored card stock and a strip of patterned paper. The card is finished off with a die cut tag embossed with one of the sentiments from the stamp set.
After I was done with that card, I just couldn't leave it at that. I HAD to make a watercolor card too! Click here to see the second card I made.
Thanks for checking out my card!
Sunday, November 1, 2015
Halloween!
It was a busy October around here, with all kinds of stuff getting made- cookies, Halloween costumes, and jack-o-lanterns in particular. Here are a few pictures of what I made this month:
| Carmel Apple Pie Cookies- Yum! |
Of course there were costumes to be made this month. I brought up the question of costumes while we were in Disney World in August, which lead to my kids choosing this:
| Sorcerer Mickey and his enchanted broom- ready to Trick-or-Treat. |
Sorcerer Mickey and his enchanted broom! My oldest bought the hat and hands at WDW, so I just had to make him a red robe. I waited for patterns to go on sale and picked up a robe pattern for $1 at Joann's. For my youngest, I used a PJ pattern and cut the pants EXTRA wide. I ended up deciding I needed some more length for extra volume at the waist so I altered it a bit there. I also put in elastic casings (using bias tape) at the ankles and cut the cuffs into zig-zag fringe, rather than hemming. The water buckets were two plastic pails that I lined with sequin dot fabric and covered on the outside with fun foam strips. I left the lining fabric extra long, so it pooled on the inside of the bucket and could be "poured" out.
After the broom costume got worn twice (we do our neighborhood trick or treat early, and then there was trunk-or-treat at school) we decided that perhaps it wouldn't be the best choice for the school costume parade and class party, so we ran out to Salvation Army and picked up a white dress shirt to turn into a lab coat. The cuff that were cut off of the sleeves turned into pockets. He made a great scientist!
| A lab coat fit for a second grader. |
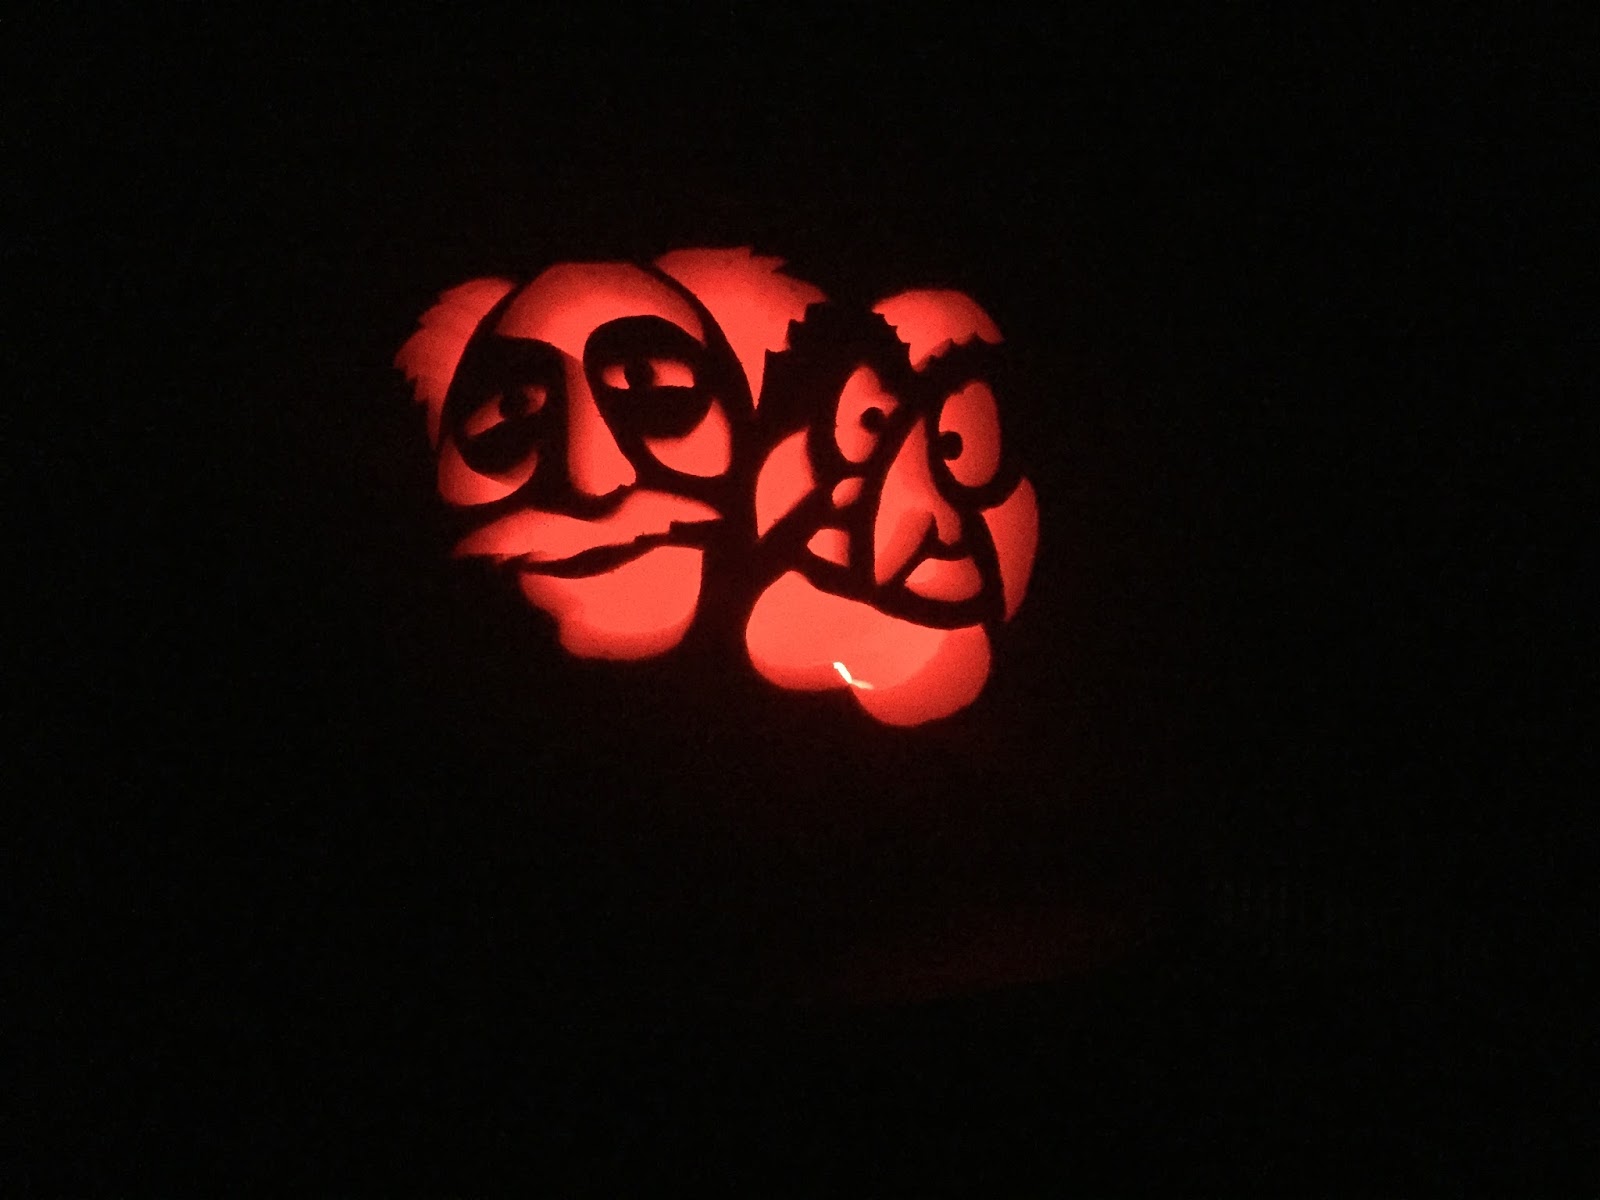
Finally, on Halloween afternoon, we carved our pumpkins before heading over to my in-laws for more trick-or-treating.
That's Benny (from The Lego Movie), a vampire minion, and Snoopy in the top row (carved by my oldest, youngest, and husband, respectively) and Statler and Waldorf (from the Muppets, and carved by me) below. I found the patterns online, but sadly can't remember where!
I also made a birthday card this month, but forgot to take a picture of it! Oh well! Can't wait to see what November brings.
Monday, September 28, 2015
Total Lunar Eclipse
Okay, so I didn't make it, per se, but here are a couple of pictures I took of Sunday's total lunar eclipse using my iPhone 6 and a telescope. I didn't do anything fancy... just held the camera lens up to the eye piece of the telescope. It took a little bit of fussing to get the image on screen, but I think they turned out pretty good!
Subscribe to:
Posts (Atom)